What Parts Are Needed to Install a Car Sound System?
Upgrading a vehicle’s audio setup transforms every drive into an immersive listening experience. Whether a driver craves crystal-clear highs, thunderous bass, or balanced midranges, the right combination of parts and precise installation is key. This guide breaks down all the essentials of car sound system installation so installers, DIYers or professionals can assemble a system that delivers pristine audio performance with lasting reliability.
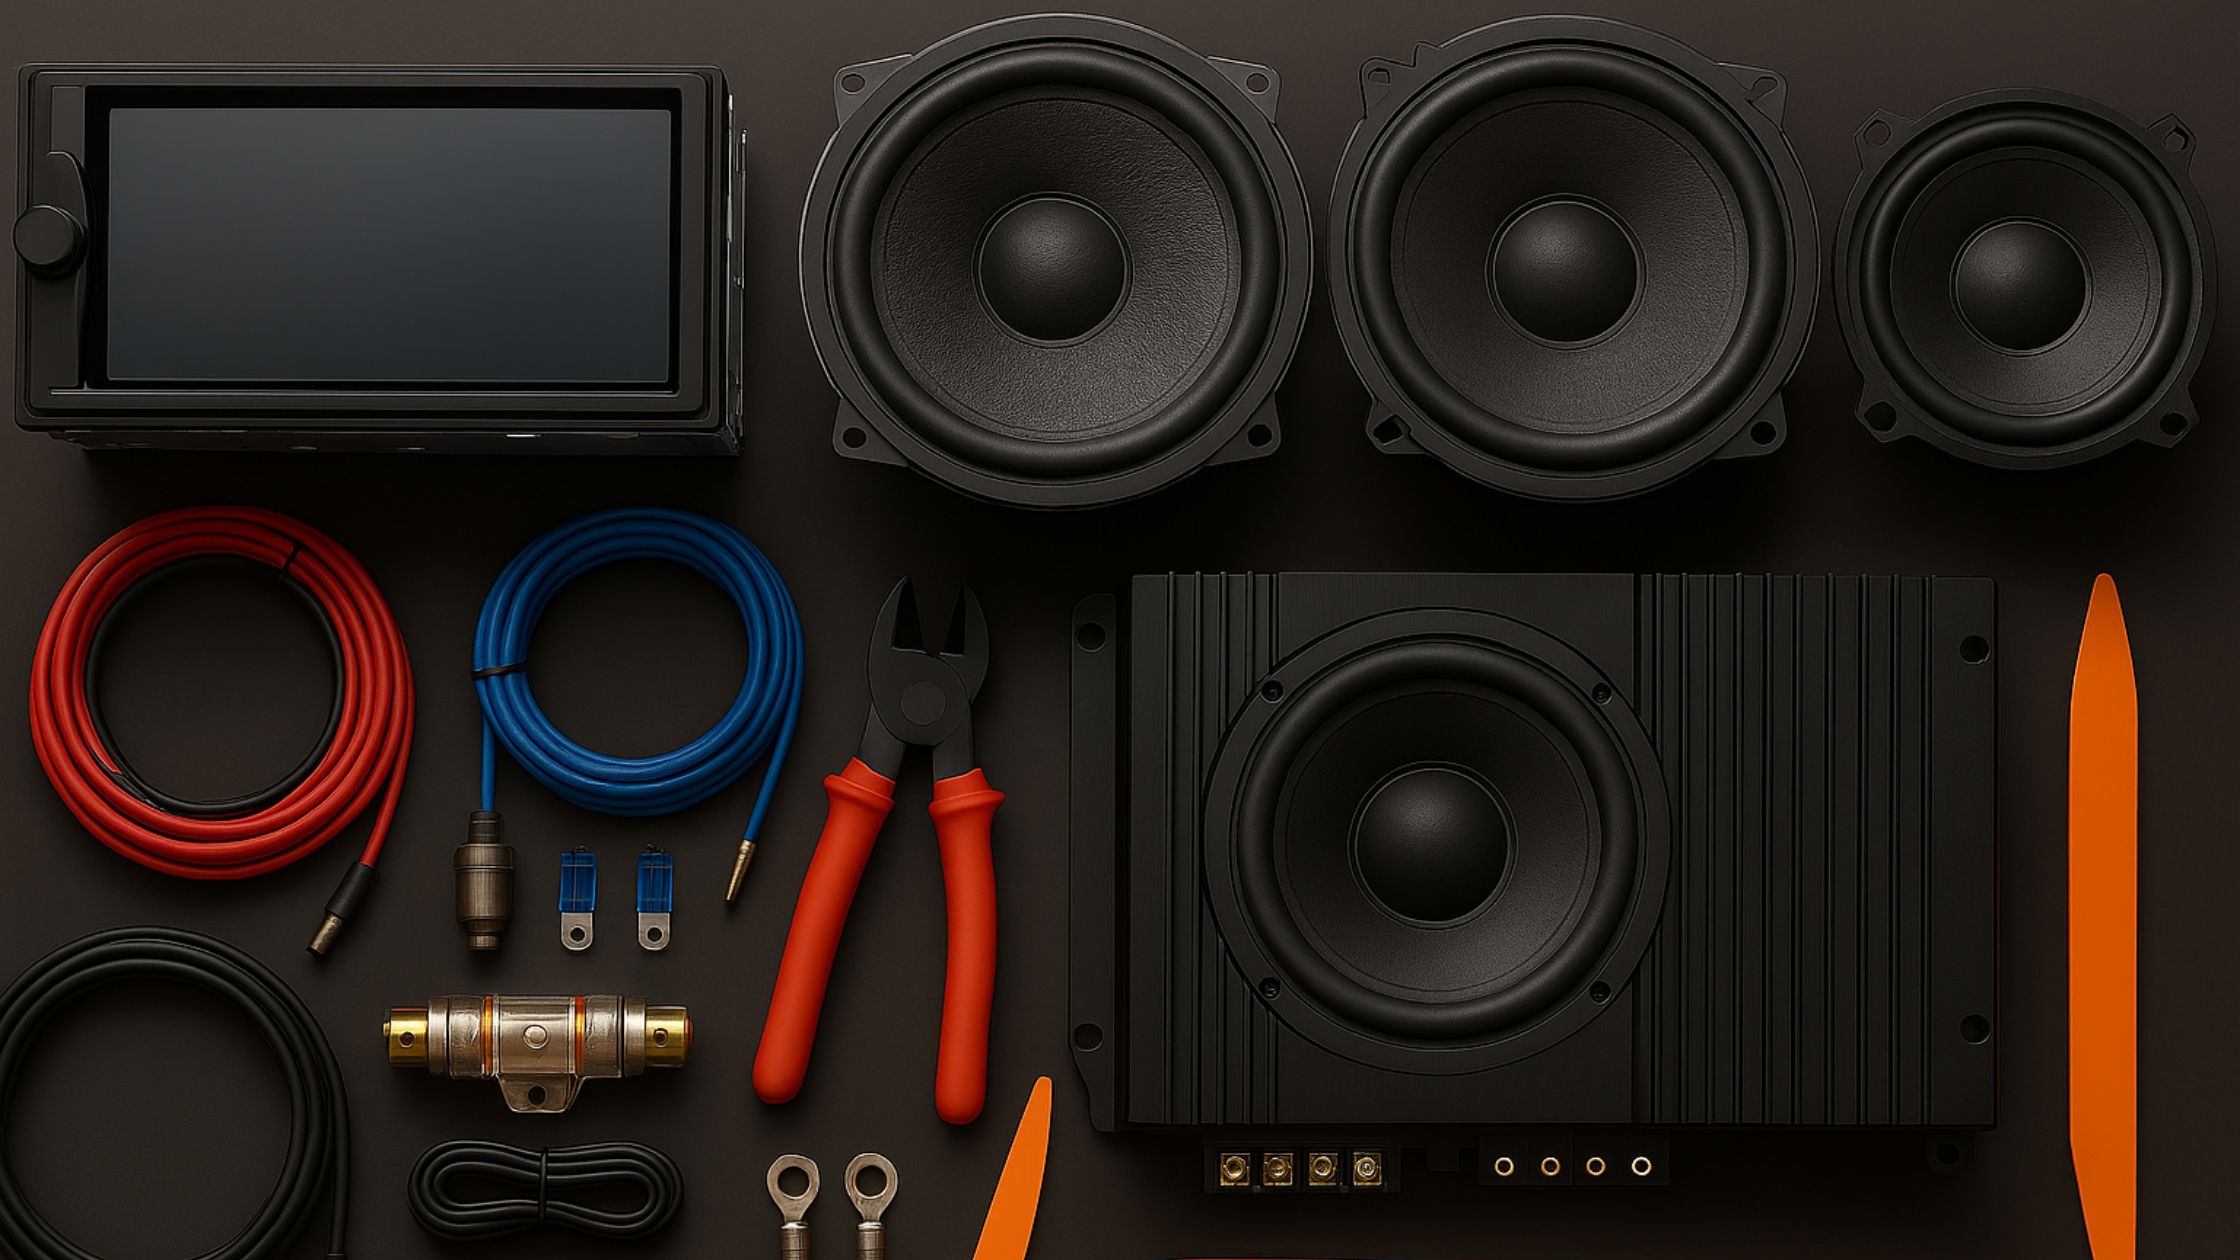
Car Sound System Installation Parts
Car sound system installation parts fall into three categories: core audio hardware (head unit, speakers, subwoofers, amplifiers), wiring and accessories (power/ground cables, harnesses, adapters), and installation tools or accessories (dash kits, trim tools, heat-shrink tubing). For a broad overview of process steps, including vehicle preparation and final tuning, see What is Car Sound System Installation?
Head Units: The Control Center
The head unit serves as the command post, routing audio signals, providing user controls, and often offering smartphone integration. Installers choose between single-DIN and double-DIN chassis based on dash space. Key considerations include:
- Preamp outputs (RCA jacks) for external amplifiers
- Built-in Bluetooth, Apple CarPlay, or Android Auto support
- Internal equalizer or DSP capabilities
- OEM wiring harness compatibility and dash-kit requirements
How Does Car Audio System Installation Work explains how proper mounting and wiring of the head unit sets the foundation for the entire system.
Speakers: Delivering Mid and High Frequencies
Speakers convert electrical signals into audible sound waves. Two main types dominate car audio:
- Coaxial speakers (all-in-one woofers with integrated tweeters)
- Component speakers (separate woofers, tweeters, and external crossovers)
Specification highlights:
- Power rating (watts RMS) to match amplifier output
- Sensitivity (dB) for efficiency and volume potential
- Mounting depth and diameter for proper fitment
Tweeters handle high frequencies and are often mounted at ear level on A-pillars or dash tops while midrange drivers occupy door or rear-deck locations.
Amplifiers: Powering the System
Amplifiers boost audio signals from the head unit to drive speakers and subwoofers cleanly. Typical configurations:
- 2-channel amps for front or rear speaker pairs
- 4-channel amps to cover all four door speakers
- Mono (single-channel) amps dedicated to subwoofer(s)
When selecting an amp, ensure its RMS power matches speaker impedance (ohms) and power handling to avoid distortion or damage. High-quality amplifiers also include variable crossovers, gain controls, and remote turn-on leads for integration.
Subwoofers: The Bass Engine
A subwoofer adds low-frequency depth that full-range speakers cannot reproduce. Components include:
- Subwoofer driver size (8″, 10″, 12″, 15″)—larger cones deliver deeper bass
- Enclosure type: sealed for tight, accurate response; ported for boomier output
- Subwoofer amplifier or channel in a multi-channel amp
Strategic placement (trunk, under seat, or rear cargo area) and proper enclosure tuning crucially affect bass quality and trunk airflow. For local professional installs, installers may refer to Car Sound System Installation in Charleston, SC.
Wiring and Installation Parts
Safe, clean wiring is the backbone of any reliable car audio system. Essential wiring parts include:
|
Part |
Purpose |
|
Power cable (2-0 gauge, 4 gauge) |
Supplies battery power to amplifier |
|
Ground cable (same gauge as power) |
Completes electrical circuit to chassis |
|
RCA interconnects |
Carries low-level audio signals from head unit to amp |
|
Speaker wire (16–12 gauge) |
Connects amplifier outputs to speakers/subwoofer |
|
In-line fuse and fuse holder |
Protects wiring against shorts |
|
Remote turn-on lead |
Triggers amplifier on/off with head unit |
|
Distribution block (for multi-amp) |
Splits power wire safely among multiple amplifiers |
High-performance installations often utilize oxygen-free copper (OFC) wire, high-stranded conductors, and quality ring terminals to minimize voltage drop and resist heating.
Accessories and Dash Integration
Beyond main components, accessories ensure a factory-like, polished finish:
- Wiring harness adapters or OEM-retention modules for steering-wheel controls
- Dash or pocket kits to fill installation gaps
- Antenna adapters to maintain radio reception
- Speaker baffles and foam spacers prevent sound wave absorption into doors
- Sound-deadening materials (e.g., Dynamat, Noico) to reduce road noise and panel resonance
Proper use of heat-shrink tubing and cable ties secures connections and keeps wiring harnesses neat, while specialized panel removal tools prevent trim damage during assembly.
Installation Tools Checklist
A smooth installation requires more than parts. Tools commonly on a car audio installer’s bench include:
- Wire strippers, crimpers, and soldering iron (for dependable electrical joints)
- Multimeter (for measuring voltage, continuity, grounding points)
- Drill and mounting bits (for amplifier racks, enclosures)
- Trim-removal kit (for safe disassembly of panels)
- Heat gun (for shrinking tubing around wire joints)
- Torque wrench (to secure battery terminals and amplifier mounts)
For turnkey service, many retailers bundle these in installer kits, but DIY builders often grow their toolkit over several projects.
Signal Processing: Crossovers & DSP
Splitting frequencies correctly enhances clarity and system balance. Two approaches:
|
Processor |
Function |
|
Passive crossover |
Fixed frequency dividers for component sets |
|
Active electronic crossover |
Adjustable frequency, slope controls for precise tuning |
|
Digital Signal Processor (DSP) |
Room correction, time alignment, advanced EQ |
A DSP or equalizer allows installers to fine-tune time-alignment and compensate for vehicle cabin acoustics, achieving a concert-hall listening experience in the driver’s seat.
Step-by-Step Installation Overview
- Vehicle Prep: Disconnect the battery, remove factory stereo, clear trim and seating.
- Run Power & Ground: Drill through firewall (with grommet), route cables along factory lines to trunk or amplifier location.
- Mount Components: Secure head unit with dash kit, install speakers with foam baffles, mount amplifier on stable surface with good ventilation.
- Wire & Connect: Attach power, ground, remote turn-on, RCA, and speaker wires, observing proper polarity.
- Fuse & Test: Install inline fuse near battery, reconnect battery, power up head unit and amplify to test each channel.
- Tune & Seal: Use crossovers or DSP to adjust filters and gain, reassemble panels, and use sound-deadening reinforcements where needed.
A complete guide to these steps is available under How Does Car Audio System Installation Work for those seeking deeper technical walkthroughs.
Professional Installation vs. DIY
While many enthusiasts undertake car sound system installation parts projects, the complexity of modern vehicle electronics and need for precise tuning often prompt drivers to seek professional installers. Pros offer: • Warranty on labor and parts integration • Advanced tools for chassis-sound analysis (RTA, oscilloscope) • Faster turnaround and tidy panel reassembly • Compliance with vehicle electrical safety codes
However, a methodical DIYer armed with the right parts list, tools, and tutorials can achieve comparable results on a budget.
Conclusion
A reliable, high-fidelity car sound system hinges on selecting the correct hardware—head unit, speakers, amplifiers, subwoofer—and supporting parts like wiring, crossovers, and dash accessories. Investing time in planning part compatibility, mastering wiring techniques, and leveraging sound processing tools ensures that every note sounds just as the artist intended. Whether a DIY enthusiast or professional, installers can turn any commute into a concert by following this comprehensive parts checklist.
For expert car sound system installation services backed by ten years of local experience, contact Audio Evolution SC today to elevate your driving soundtrack.
FAQs (Frequently Asked Questions)
What gauges of wire are recommended for car audio power and ground?
Power cables typically run from 4- to 0-gauge, depending on amplifier draw. Ground wiring should match the power gauge for safety and performance.
Can I use coaxial speakers instead of component speakers?
Yes. Coaxials are simpler and cost-effective. Component sets offer superior staging by separating woofer and tweeter placement for clearer imaging.
Why is a remote turn-on wire necessary?
The remote lead tells amplifiers to switch on only when the head unit is active, preventing battery drain and unintended noise.
What’s the benefit of a sealed vs. ported subwoofer enclosure?
Sealed boxes provide tight, accurate bass response ideal for varied music genres. Ported enclosures are louder and produce deep booms favored by bass enthusiasts.
How does a digital signal processor (DSP) improve sound quality?
A DSP corrects vehicle-specific acoustic issues through time alignment, equalization, and crossover management, delivering a balanced and immersive listening experience.
- Hits: 7010